Frame bearing replacement for Bird Aether 9
Tuesday night Gordon and I retired to his safe space; his garage. A bike was going under the knife for new frame bearings.
My bike to be precise. Ever since Sauvage turned savage my Bird Aether 9 has been languishing at home, quietly gathering dust and donating parts to keep my Pace running.
It’s been long overdue a bearing service. In fact, my Bird Aether 9 has currently covered 2,500 miles from new with no bearing attention at all.
How to tell if frame bearings need to be replaced
Well, with reference to that Sauvage incident, the handling of the Bird was getting pretty inconsistent, something I noticed most carving broad turns when the rear would squirm unpredictably. With so many parts on a bike, what to attribute that movement to? Soft tyres? Wheel bearings? A loose rear axle? It could be any number of things.
The best indicator was when I held the seat tube steady and put sideways force on to the wheel; then I could see movement around the main pivot (the large lower pivot). It was pretty obvious where the problem was.
What was needed for the job?
When it comes to replacement frame bearings you have three options.
- Just buy a new bike (or as many would have it, take the Surrey option). As insensitive as it is to some, this option is 100% effective.
- Alternatively, take your bike to the local bike shop and invite some ‘open wallet surgery’. This should also be 100% effective.
- Or, take the DIY option. With absolutely no guarantee of success at all…
Guess which one I chose? Yes, I chose the DIY route but I took three steps to increase my chances of success.
- I invested in a set of bearing pullers and a bearing press kit from Bearing Pro Tools. They list pullers and press kits for bikes by brand and model, and they are excellent.
- Next, I bought some good quality Enduro MAX bearings from BETD.
- Finally, I invited myself round to Gordon’s garage. It is well-lit, has plenty of space and a very clean, clear floor covered in interlocking garage mats. And two pairs of hands make a difference with this kind of job.
Just to be clear; neither Bearing Pro Tools nor BETD (or Gordon for that matter!) have paid me to advertise them. This is just what I used for the job.
How to replace your frame bearings
Basically this is the closest your bike gets to open heart surgery. All is laid bare but being methodical really helps.
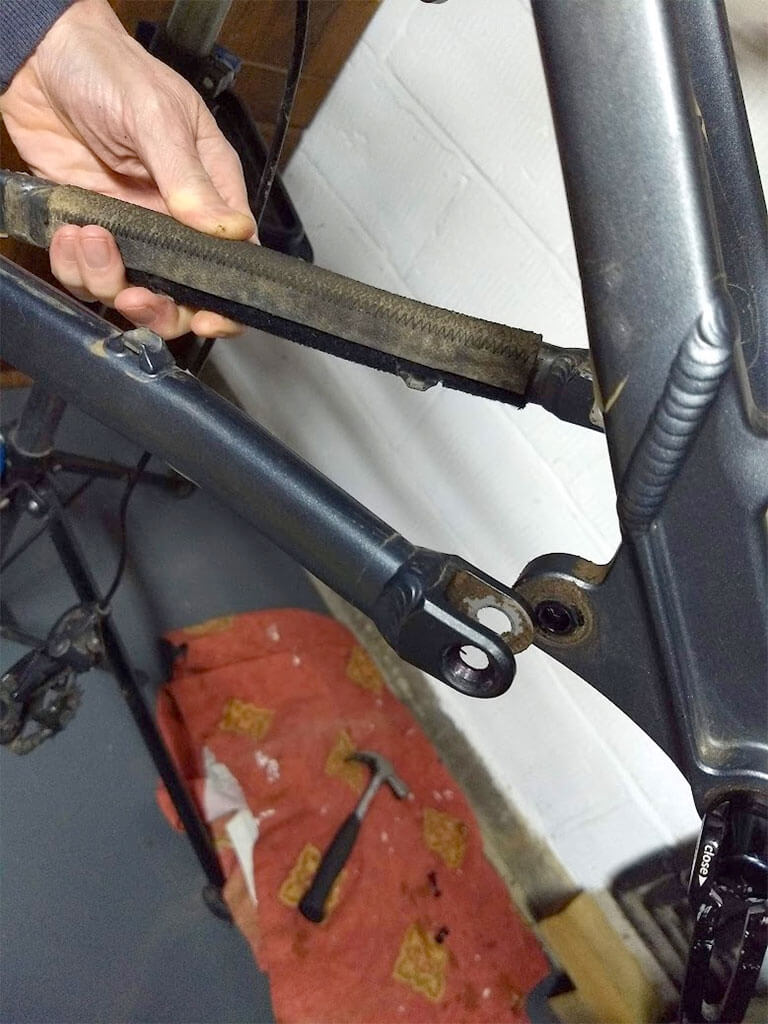
First off, you will need to remove your rear derailleur and rear brake from the swingarm. Next, let all the air out of the rear shock and detach the lower link so the shock can be moved out of the way.
Then start unbolting the swingarm. I don’t think it massively matters what order you do this in but we started with the main pivot, then the rear axle pivots before detaching the upper link.
A useful tip with the upper link is to gently squeeze the two sides of the swingarm together at the axle end, which opens the upper link enough to slide it off the rocker.
After that, the rocker linkage can come off too.
Another tip: take photos during disassembly. It always pays off later!
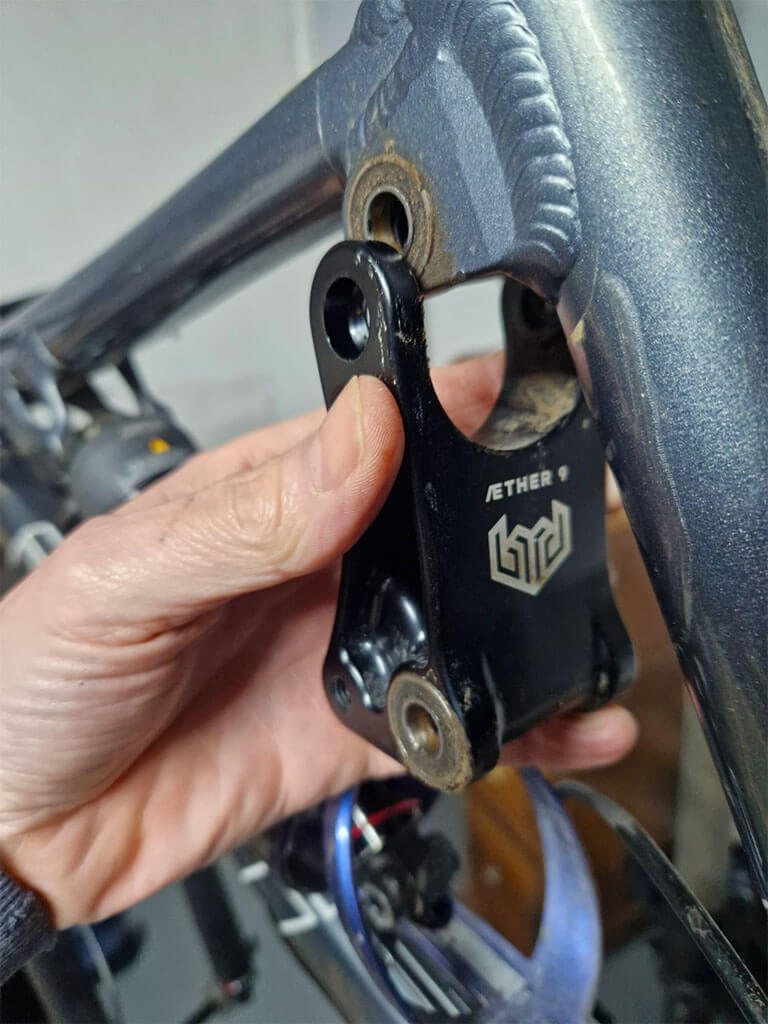
So at this stage we had a rocker linkage with two bearings, an upper swingarm/seatstay linkage with four small bearings and a lower swingarm/chainstay link. Two main bearings and two upper linkage bearings for the rocker remained in the frame.
In total the Bird Aether uses 10 bearings. My Aether was showing most wear on the upper rocker linkage bearings and the main pivot bearings which all felt rough and rumbly.
Knock out the bearings
Two pairs of hands. One vice. And three different sized pullers for three different bearing sizes.
A word about pullers.
The bearing pullers for the Bird are the expanding type but some frames have enough meat around the bearing to use a wind out version that literally pulls the bearing from the frame. No hammer required, it just depends on your bike. Bearing Pro Tools will supply exactly what’s needed.
The idea is you slide the puller into the centre of the bearing, then tighten so that the puller expands and grips the bearing firmly. Don’t go mad; it’s easier to re-tighten the puller than over tighten and have so much force on the bearing that it in turn grips the part its sitting in.
After that, tap it out from the other side.
The Bearing Pro Tools bearing press kit has a threaded bolt that has two plain unthreaded ends, so that proved ideal for tapping out the bearings using a hammer and some sharp taps.
Having Gordon to support the linkage while I – at first – tentatively wielded the hammer was a big help.
We started with the rocker linkage and the bearings came out reasonably easily given our tentative first efforts.
It’s worth saying I have seen on Bird’s Facebook page that people sometimes find the bearing gets properly stuck.
I think that’s normally down to corrosion, the expanding puller is over tightened, or just bad luck. Sometime’s the inner bearing face breaks away, leaving the outer face stuck in the frame, but again this can be rescued.
Bearing Pro Tools supply a tool to get that out too!
Replace the bearings
It makes sense to replace the bearings as you go along, especially with 10 bearings and three different sizes.
Much easier to just swap out and swap in as you go along or risk getting very confused. The bearing press was terrific – there’s an adaptor for each bearing size which helps align everything and gently ease the bearing into place.
I used some grease on the receiving part as a help to future me when it comes to replace these again.
Next up, the rear upper swingarm. This actually has four small bearings to remove with a tiny sleeve/ring between them. Each of the four bearings have a protective cap which needs to be prised off first, an easy task.
Again, two pairs of hands really help with the bearing removal as it is not easy to support the irregularly shaped swingarm.
We started on the two outer bearings and found the bolt we were using as a driver to tap out the bearing was a wee bit short. The way I use it, the bolt goes though the opposite pair of bearings and rests on the puller so a longer bolt would have helped. The two inner bearings proved easier to remove.
Fitting the new bearings into the swingarm also needed a little care. Due to the design of the swingarm but we used one of the larger bearing cups to keep the press square on the opposite side and provide enough clearance to turn the T-handles.
Once one bearing is fitted, pop the tiny sleeve ring into place and press in the second bearing.
Frame bearings
Finally it’s time to replace the four bearings still in the frame. The process is essentially the same but it’s important to support the frame while you do this.
Gordon and I decided it best to lay the frame on the garage floor (another reason it helps to have a clean garage floor!) and pack wood blockwork around the metalwork around the bearing recess. Then hold the frame firmly while your assistant knocks out the bearing.
As previously, the bearing press makes inserting new bearings very easy. In fact it’s much easier when you are pressing in the bearings in pairs rather than singly as with the swingarm.
Re-assembly
Lastly it’s time to put the frame back together. Here, any photos you took earlier can prove useful as you attempt to return the frame to the same shape it was a couple of hours earlier!
Attach the rocker link to the frame, then the lower chainstay link to the main pivot.
Edit: MikeB on FB kindly reminded me to include threadlock in the re-assembly! Very good advice, thanks Mike.
At this point we attached the upper seatstay link to the rocker but hindsight is a wonderful thing. We ended up with a period of tussling trying to get the rear axles bolts into place. On reflection I would suggest the next step is to connect the rear axle pivot bolts and then connect the upper linkage to the rocker link as the final step.
Either way, we managed it!
Last steps
You still don’t have a working bike! You still need to connect the rear shock, air it up, refit the rear brake and attach the rear derailleur but at least the slightly scary frame bearing replacement bit is done.
Don’t forget to tighten all bolts to the required torque settings and you should be good to go. Before you ride the bike, check them again!
Wednesday night was my first ride on the Aether since September last year. It was like riding a new bike…
Every cyclist loves coffee!
☕Buy Matt a coffeeThere are 4 replies to Matt so far
We really appreciate comments from our readers. If you have something to say, we'd love to hear from you.
To add to the conversation, jump to our comments form or reply to individual comments.
May 31, 2024 at 8:12 am
Muddy John says:
“carving broad turns when the rear would squirm unpredictably” – sounds just like my skiing.
, or add a new comment
May 31, 2024 at 9:25 am
Matt says:
Me too JR, except it was so long ago I can’t remember!
Actually the movement was felt most on tarmac, there’s a turning I take on a quiet road on the way to Bockett’s which is slightly downhill.
No load through the pedals as I’m free-wheeling, taking the constant radius turn at about 10-12mph. Then I could feel the movement quite clearly but spent a long time thinking it was my imagination or I needed a new shock!
(I still need a new shock of course…)
, or add a new comment
June 2, 2024 at 8:45 am
Simon Stunell says:
If you store your new bearings in the freezer overnight prior to fitting, they’ll go in much more easily as they will be slightly smaller than their seat due to contraction whilst frozen.
, or add a new comment
June 2, 2024 at 10:04 pm
Matt says:
Good tip Simon. I haven’t tried this myself but it makes sense as the Tesco option – every little helps!
, or add a new comment